Unleash Flavor: Master the Art of Baby Back Ribs in the Oven
For too long, the grill and smoker have reigned supreme in the realm of barbecue ribs, leading many to believe that truly tender, fall-off-the-bone perfection is impossible without a fiery outdoor setup. We're here to challenge that notion. Imagine succulent, juicy ribs, boasting a rich, sweet, savory, and subtly smoky flavor, with meat so tender it practically melts from the bone – all achieved with the humble convenience of your kitchen oven. Yes, you can master incredible
baby back ribs in the oven, delivering a gourmet experience any time of the year, regardless of weather or grilling restrictions. This comprehensive guide will transform your kitchen into a BBQ haven, proving that oven-baked ribs are not just an alternative, but a truly outstanding method for making your new favorite family meal.
The Magic Behind Perfectly Tender Oven-Baked Ribs
So, how do oven-baked ribs achieve such legendary tenderness? The secret lies in a brilliant combination of low-and-slow cooking and intelligent moisture retention. Forget the dry, chewy ribs of past failed attempts; this method ensures every bite is infused with flavor and succulence.
The cornerstone of this technique is aluminum foil. By tightly wrapping each slab of ribs in foil, we create a self-contained braising environment. This traps all the flavorful liquids and steam, allowing the ribs to essentially slow-cook and steam in their own juices and an aromatic braising liquid. This gentle, moist heat breaks down the tough connective tissues in the meat over several hours, resulting in that coveted "fall-off-the-bone" texture that BBQ enthusiasts crave.
Moreover, cooking
baby back ribs in the oven offers unmatched consistency. You avoid flare-ups, uneven cooking spots, and the constant monitoring often required with a grill. The oven maintains a steady, even temperature, making the process remarkably hands-off. Once wrapped and in the oven, you can relax, knowing that culinary magic is quietly unfolding. And let's not forget the added bonus: baking in foil drastically reduces cleanup, giving you more time to savor your delicious creation and less time scrubbing dishes. For a deeper dive into this incredible method, check out our guide on
Foil-Wrapped Oven Ribs: Sweet, Smoky & Easy Cleanup BBQ.
Crafting Your Masterpiece: A Step-by-Step Guide to Oven-Baked Ribs
Creating spectacular
baby back ribs in the oven is a straightforward process, built on layers of flavor and patient cooking. Here's how to turn humble slabs of pork into an unforgettable feast.
Essential Ingredients for Flavorful Ribs
Our recipe is designed to deliver a harmonious balance of sweet, savory, and smoky notes, with a delightful tang. You'll need:
*
For the Ribs:
* 2 slabs baby back ribs, approximately 1 to 1.5 pounds each. Look for meaty ribs with good marbling.
*
For the Dry Rub:
* 1/4 cup light brown sugar: Provides sweetness and helps with caramelization.
* 1 tablespoon chipotle chile powder: Delivers smoky depth and a mild kick.
* 2 teaspoons kosher salt: A fundamental flavor enhancer.
* 1 teaspoon onion powder & 1 teaspoon garlic powder: Essential aromatics for savory complexity.
* 1 teaspoon seafood seasoning (like Old Bay): Adds a unique, savory, and subtly spiced dimension.
* 1/2 teaspoon freshly ground black pepper: For a touch of classic spice.
*
For the Braising Liquid & Glaze:
* 1 cup apple cider: Adds moisture and a hint of fruity sweetness.
* 2 tablespoons apple cider vinegar: Provides crucial tang and helps tenderize the meat.
* 1 tablespoon pure maple syrup: Enhances sweetness and contributes to a glossy glaze.
* 1 tablespoon Worcestershire sauce: Deepens umami and complexity.
* 2 cloves garlic, minced: Fresh garlic infuses the liquid with pungent aroma.
Preparation: Setting the Stage for Success
1.
Prepare the Ribs: The first crucial step is to remove the silver skin (membrane) from the back of each rib slab. This thin, tough membrane can prevent the rub from penetrating and makes the ribs less pleasant to eat. Use a knife to lift an edge, then grip with a paper towel and pull it off. If your ribs are larger than 1.5 lbs, consider cutting them in half to ensure even cooking and better foil contact.
2.
Mix the Dry Rub: In a small bowl, combine all the dry rub ingredients: brown sugar, chipotle chile powder, salt, onion powder, garlic powder, seafood seasoning, and black pepper. Mix thoroughly until well combined.
3.
Apply the Rub and Chill: Place each slab of ribs on a large piece of heavy-duty aluminum foil, ensuring there's enough foil to eventually seal them completely. Generously sprinkle and pat the dry rub onto both sides of the ribs, pressing it gently into the meat. For optimal flavor penetration, refrigerate the seasoned ribs, meat-side down and uncovered, for at least 1 hour, or preferably several hours. This also helps dry the surface slightly, leading to a better crust later. Preheat your oven to 300°F (150°C).
Braising: The Heart of the Tenderness
1.
Prepare the Braising Liquid: While the ribs chill, combine the apple cider, apple cider vinegar, maple syrup, Worcestershire sauce, and minced garlic in a small bowl. This fragrant liquid will infuse the ribs with incredible flavor and moisture during the slow cook.
2.
Seal in Flavor: Remove the ribs from the refrigerator. Pour half of the braising liquid over each slab of ribs. Now, tightly seal each slab in its aluminum foil packet, crimping all the edges securely to prevent any steam or liquid from escaping. A tight seal is paramount for creating that moist braising environment. Place the foil packets on a baking sheet.
3.
Slow Bake to Perfection: Transfer the baking sheet with the foil-wrapped ribs to the preheated oven. Bake for approximately 2 hours, or until the meat is incredibly tender and visibly starts to pull away from the bones. The exact time may vary slightly depending on your oven and the thickness of the ribs.
Finishing Touches: Glaze and Char
1.
Reduce the Braising Liquid: Carefully remove the baking sheet from the oven. Be cautious when opening the foil packets, as hot steam will escape. Pour all the delicious braising liquid from the packets into a small saucepan. Bring the liquid to a simmer over medium heat and reduce it until it thickens into a glossy, syrupy glaze, which typically takes about 4-6 minutes.
2.
Prepare for Broiling: While the glaze reduces, line a clean baking sheet with fresh foil for easy cleanup. Gently transfer the tender ribs from their original foil packets to the prepared baking sheet. Position an oven rack on the top level and preheat your broiler.
3.
Glaze and Broil: Using a pastry brush, generously coat the ribs with about half of your homemade glaze. Place the ribs under the broiler for about 1 minute, watching closely to prevent burning. The goal is to get some nice caramelization and slight char. Remove, brush with the remaining glaze, and return to the broiler for another minute or so until beautifully charred in spots.
4.
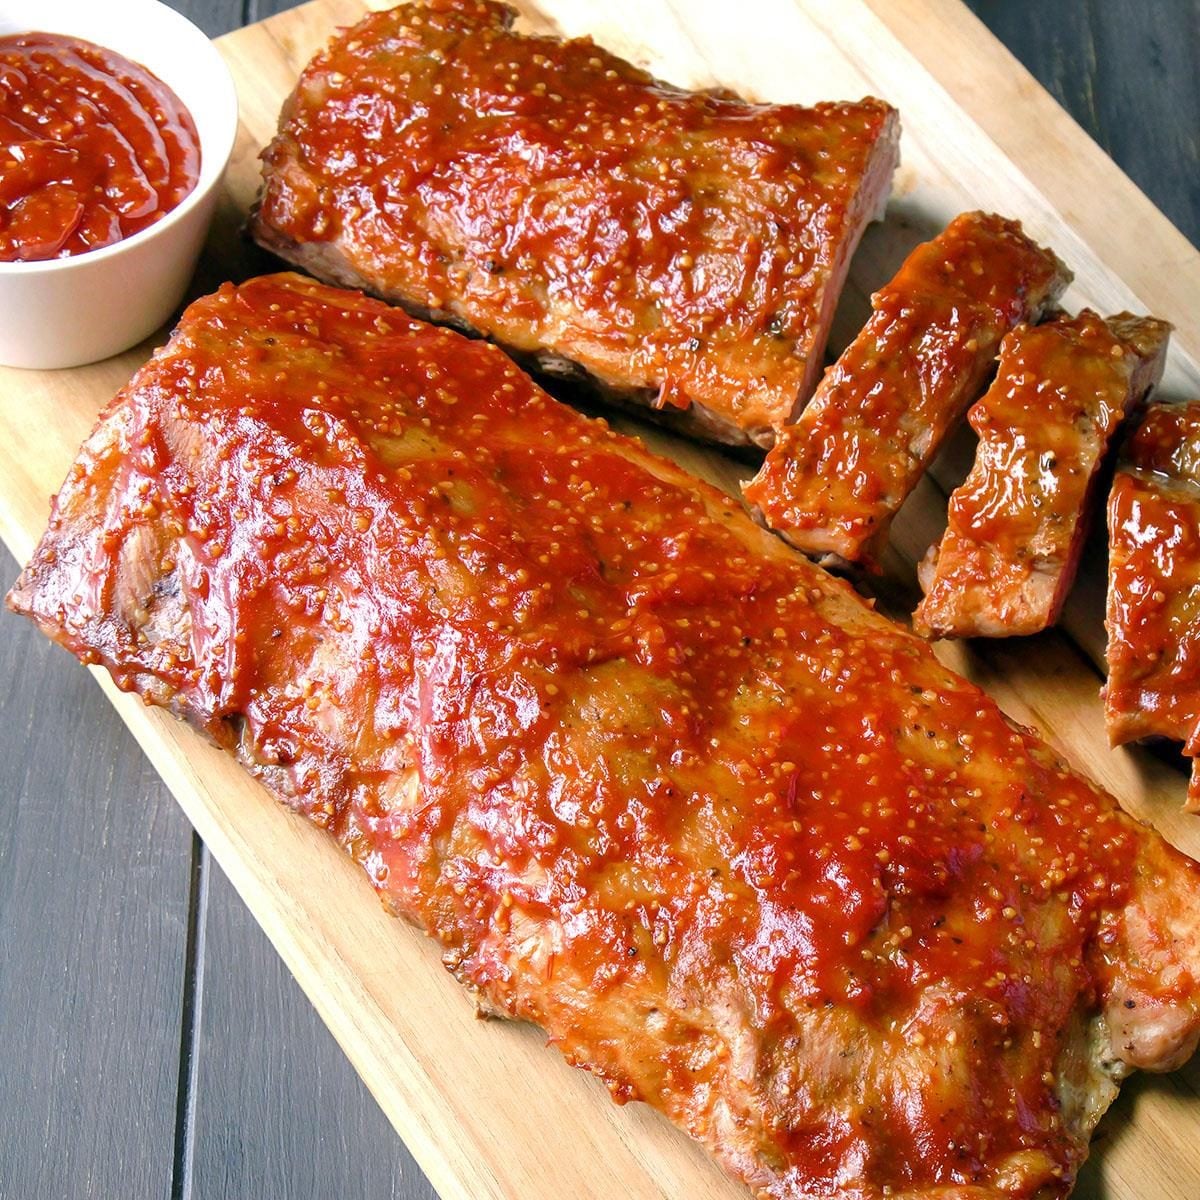
Serve: Once glazed and lightly charred, remove the ribs from the oven. Allow them to rest for a few minutes before slicing each rack between the bones into 2-rib portions. Serve immediately and prepare for compliments! For more detailed techniques on achieving that perfect texture, refer to our article on
How to Make Fall-Off-The-Bone Baby Back Ribs in Your Oven.
Achieving BBQ Perfection: Essential Tips for Success
While the recipe above provides a solid foundation, these additional tips will elevate your
baby back ribs in the oven from great to absolutely legendary.
*
Quality Rib Selection: Start with good quality ribs. Look for slabs that are uniform in thickness, with a good meat-to-bone ratio and visible marbling. Avoid ribs with excessive fat or extremely thin meat. Aim for slabs around 1 to 1.5 pounds for optimal cooking.
*
Don't Skip the Membrane Removal: This step is non-negotiable for truly tender ribs. If the membrane is left on, it creates a tough, chewy layer and prevents the rub and liquid from fully penetrating the meat.
*
Give the Dry Rub Time: While 1 hour is the minimum, letting the seasoned ribs rest in the refrigerator for 4-6 hours or even overnight allows the flavors to deeply penetrate the meat. This marinating time makes a noticeable difference in the final taste.
*
Tight Foil Seal: A loose foil seal allows steam and liquid to escape, drying out your ribs. Double-check that all edges are crimped securely to ensure that moist, braising environment.
*
Monitor for Tenderness, Not Time Alone: While 2 hours is a good guideline, ovens vary. The true test of doneness is when the meat easily pulls away from the bones and feels very tender when probed with a fork. Don't be afraid to add another 15-30 minutes if needed.
*
Broiler Vigilance: The broiler is powerful! Stay right by the oven when broiling the ribs, as they can go from perfectly charred to burnt in a matter of seconds. Rotate the baking sheet if necessary for even browning.
Conclusion: Your Year-Round Rib Destination
You no longer need to wait for sunny weather or invest in expensive outdoor equipment to enjoy phenomenal BBQ. Mastering
baby back ribs in the oven means succulent, flavorful, and incredibly tender ribs are always within reach. This method delivers a truly satisfying culinary experience, from the sweet and smoky dry rub to the rich, glossy glaze, all with the added benefit of minimal cleanup. So, preheat that oven, gather your ingredients, and prepare to delight your family and friends with ribs that are so good, even the most devoted grill master will be asking for your secret. Happy cooking!